Serie: Einrichten von CX Cloud, Digital und KI für Salesforce Service Cloud Voice
Erstellen von Präsenzbenutzer- und Routingkonfigurationen
- Anwesenheitsstatus erstellen und Benutzerprofilen zuweisen
- CX Cloud, Digital und KI für Salesforce Service Cloud einrichten
- Erstellen Sie Servicekanäle
- Zuweisen von Sicherheit auf Feldebene
- Anwesenheitsstatus erstellen und Benutzerprofilen zuweisen
- Erstellen Sie Sicherungswarteschlangen für die Flows
- Erstellen Sie Flows zum Weiterleiten von Experience- und Email Experience-Objekten
- Erstellen Sie Datensatzseiten für die Experience-Objekte
- Erstellen eines OAuth-Clients für Salesforce Service Cloud Voice
- Integrieren Sie Einstein Next Best Action in Salesforce
- Erstellen Sie eine Lightning-App für Digital und KI für Salesforce Service Cloud
- Erstellen Sie Sicherungswarteschlangen für die Flows
- Installieren Sie CX Cloud, Digital und AI für das Salesforce Service Cloud Voice-Paket.
Für Agenten, die Genesys Cloud-Chats und -E-Mails verarbeiten, ist eine Anwesenheitsbenutzerkonfiguration erforderlich, und für Flows ist eine Routingkonfiguration zum Weiterleiten der Experience- und Email Experience-Objekte erforderlich.
Legen Sie die Kapazität Ihrer Agenten fest. Wenn Sie beispielsweise 10 Agenten haben und jeder Agent fünf Chats gleichzeitig bearbeiten kann, können Sie die Kapazität auf 50 festlegen.
Erstellen einer Präsenzbenutzerkonfiguration
Legen Sie für die Presence-User-Konfiguration die Kapazität Ihrer Agenten fest. Wenn Sie beispielsweise 10 Agenten haben und jeder Agent fünf Chats gleichzeitig bearbeiten kann, können Sie die Kapazität auf 50 festlegen.
So erstellen Sie die Anwesenheitsbenutzerkonfiguration:
- Suchen Sie auf der Setup-Startseite im Feld „Schnellsuche“ nach „Präsenzkonfigurationen“ und klicken Sie auf Anwesenheitskonfigurationen .
- Klicken Sie auf Neu.
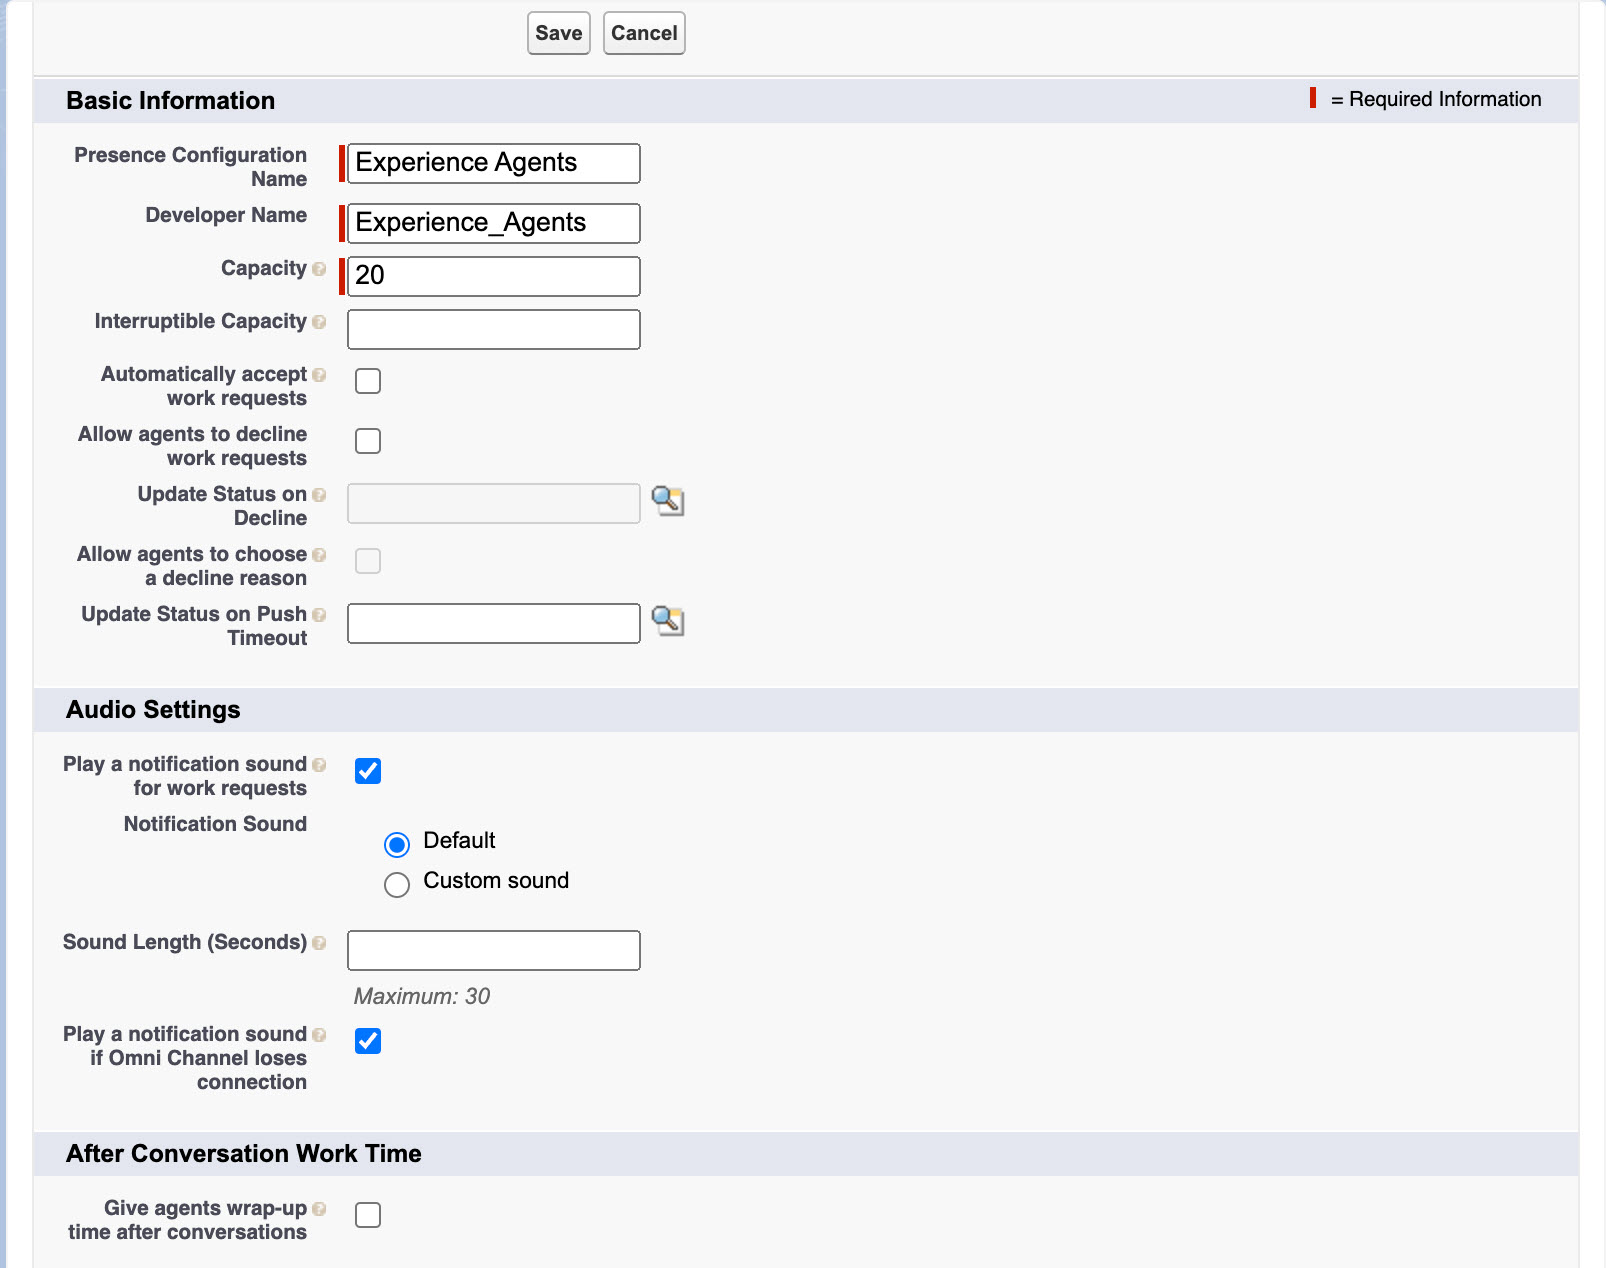
- Unter dem Grundinformation Abschnitt:
- Geben Sie den Name der Anwesenheitskonfiguration .
- Geben Sie den Kapazität der Agenten.
- Unter dem Audio Einstellungen Abschnitt:
- Wähle aus Einen Benachrichtigungston für Arbeitsanfragen abspielen Möglichkeit.
- Wählen Standard als die Benachrichtigungston .
- Wähle aus Einen Benachrichtigungston abspielen, wenn Omni Channel die Verbindung verliert Möglichkeit.
Klicken Sie auf das Bild, um es zu vergrößern.

- Klicken Sie auf Speichern.
Nachdem Sie die Präsenzbenutzerkonfiguration erstellt haben, weisen Sie sie den Agenten oder Benutzerprofilen zu.
- Wenn Sie möchten, dass Ihre Agenten die Unterhaltungen automatisch beantworten, konfigurieren Sie die Anwesenheitskonfiguration in Salesforce und stellen Sie die Warteschlange in Genesys Cloud nicht auf automatische Beantwortung ein. Nur in dieser Konversation erwähnte Agenten oder Mitglieder des in der Anwesenheitskonfiguration genannten Profils können automatisch antworten.
- Sie können auch unterschiedliche Konfigurationen für Chat, Sprache und E-Mail verwenden. Einige Konfigurationen erlauben die automatische Antwort für Chats, aber nicht für E-Mails. Beispielsweise können die Konfigurationen auch unterschiedliche Alarme und Kapazitäten verwenden.
Routingkonfiguration erstellen
So erstellen Sie die Routing-Konfiguration:
- Suchen Sie auf der Setup-Startseite im Feld „Schnellsuche“ nach Routing-Konfigurationen und klicken Sie auf Routing-Konfigurationen .
- Klicken Sie auf Neu.
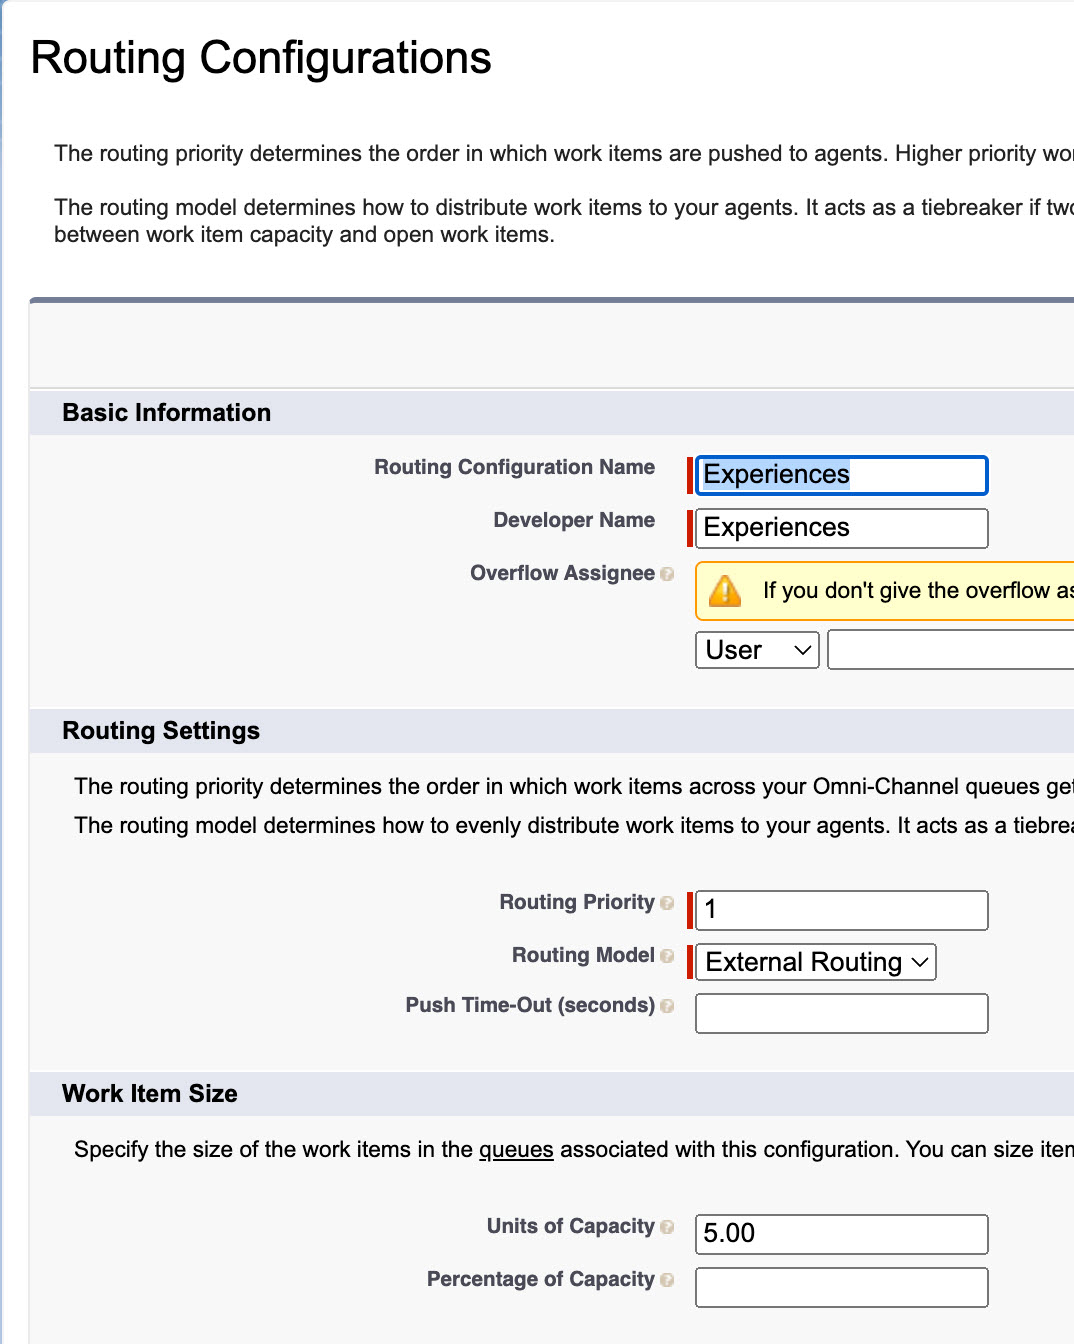
- Unter dem Grundinformation geben Sie den Name der Routing-Konfiguration .
- Unter dem Routing-Einstellungen Abschnitt:
- Eingeben1 als die Routing-Priorität .
- Wählen Externes Routing als die Routing-Modell .
- Unter dem Arbeitselementgröße geben Sie5.00 als die Kapazitätseinheit .
Klicken Sie auf das Bild, um es zu vergrößern.
- Klicken Sie auf Speichern.